
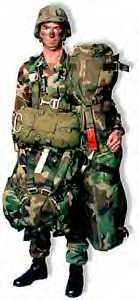
Jumble of straps: the Harness, Single-Point Release (HSPR)

At about 200 feet the modern Paratrooper lowers his equipment prior to landing. How his rucksack and possibly his weapons case is released is becoming more critical as Airborne operations go ever lower to evade radar and achieve surprise. The British 5th Airborne Brigade with their new Irvin 5200 Low-Level Parachute (LLP) are jumping as low as 290 feet at 174 knots. At this altitude, you just have time to check canopy and lower equipment immediately. Our current system, the Harness, Single-Point Release (HSPR) will drop your rucksack with one pull of a white nylon tab, but the M1950 weapons case can only be released separately by pulling the lever on the Quick-Release Snap and then it can travel down the Hook, Pile Tape Lowering Line dangling the rucksack. Most of the time we just jump the case against our side and take our lumps. I believe we should keep the weapons case by the paratrooper's side for quick access to his weapon or outfit the 82nd Airborne Division with shorter M4 carbines that can be jumped exposed/padded without need of a case. What we need is a new lighter-weight jump case for longer weapons that in an extreme emergency, the weapon can be operated while still inside. With better padding even a PLF onto the weapons case would neither damage the paratrooper or his weapon.
Current U.S. Airborne development centers on the "Air Pac(k)" a multi-purpose wrap over the rucksack with a multi-purpose weapons case that can fit weapons ranging from a carbine to a JAVELIN ATGM, that releases both ruck and weapons case with a single pull. I think the "Air Pac" weapons case has too much material for the standard M16A2 Assault Rifle which should have its own case as described above that could work seperate from the rucksack which would use the current HSPR system or simultaneously with the rucksack using the "Air Pac" system. The "Air Pac" is a great idea for those that are jumping heavy loads like the M249 Light Machine Gun, the M60 or M240B Medium Machine Gun,
To save money, the "Air Pac" could be bought for those jumping heavy loads and the HSPR could "soldier on" for use by the basic M16A2 and M4 carbine-equipped Paratrooper. One of the safety selling points for going to the "Air Pac" universally is the "single-look" the jumpmaster would have to check during JMPI. We can help the jump master by having our HSPRs rigged correctly, which can be a confusing mess of straps. To simplify this confusion, take a wide-tip, black permanent felt marker and add the following to the HSPR to give you a visual indicator that you have put it together correctly. Refer to U.S. Army and Air Force field manual, FM 57-230/TO 14D-1-1-121 Advanced Parachuting Techniques and Training, September 1989, pages 6-11 through 6-16, or the latest manual superceding it: FM 57-220?MCWP 3-1.5.7/TO 14D1-2-1-121 Static-line Parachuting Techniques and Training 19 August 1996.
1. Lay the HSPR on a flat surface and spread it out
2. Install the release handle assembly correctly with it pointing towards the adjustable cross strap: place an -------> on the center of the white handle pointing towards the adjustable cross strap and another ------->pointing in the same way on the center of the cross strap
3. Write in 1/2" block letters on the vertical harness strap without the blue ink nomenclature printing the following memory device statement:
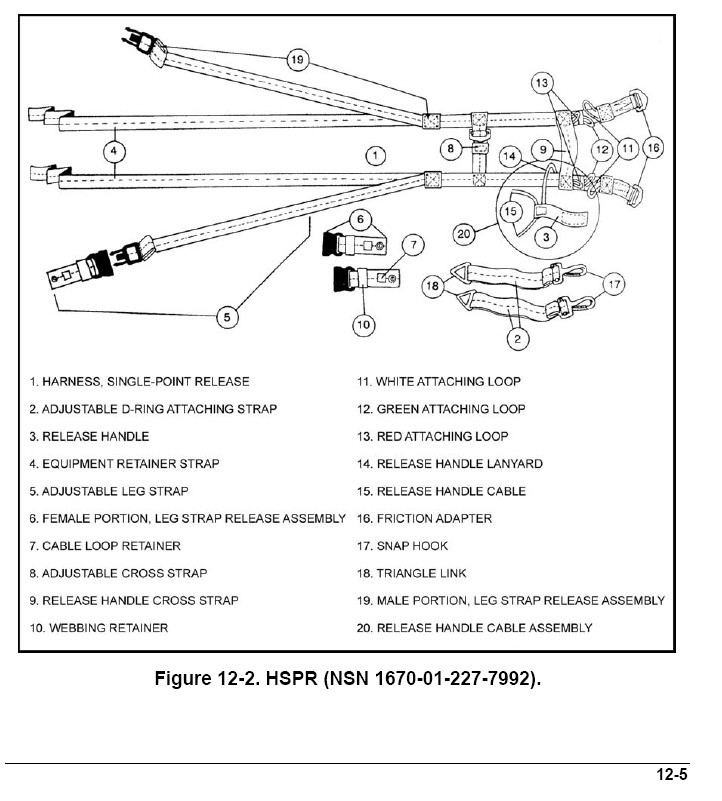
WHITE-GREEN-RED-BLACK-SILVER
This will tell you to place the WHITE attaching loops through the triangle links of the harness attaching straps, then the Olive Drab (GREEN) loops up through the white loops, then the red loops through the Green loops, then the RED loops through the BLACK grommets of the leg strap releases finished off by the clear plastic-coated SILVER release handle cables through the red loops and into the elastic cable loop retainers on the leg strap release assembly.
4. Write an -------> on the leg strap release assemblies by the elastic cable loop retainers to speed your rigging; if you don't see the arrows you have it upside down! The arrows should point towards the center cross strap, they will appear angling in but should be "flowing" into the same direction as the other arrows.
5. Make sure the Harness Attaching straps are correct; the adjusting straps should be up with the fat end tabs. This is so when you snap the hooks onto your parachute harness "D" rings you can reach the straps and pull on them to snug the rigged rucksack tight up against your stomach under the reserve parachute. Place an -------> on each strap with end tab and underneath on the strap material just above the triangle link, all arrows pointing in the same direction as the other arrows on the center cross strap and white release handle. If you've done it right, all of the arrows will be pointing in the same direction.
6. The leg straps are in a darker forest green color. The time saver needed here is to insure they are not twisted as you route them through the rucksack frame and around your legs/M1950 weapons case. Lay the entire long length flat on the ground and place a straight line across | (also known as a "hash" mark) about every 3 fingers width to help you track the strap all the way to their appropriate quick-fit adaptors. You may recognize the "Quick-fit adaptors" as being the same life-support capable buckles many "Rigger's Belts" use as mentioned in my previous AES article. If you ever come across these buckles in a discarded harness or loose, save them, bring them to a rigger so he can sew them into some type XIII nylon webbing to make a "Rigger's belt". Insist on a parachute-repair capable sewing machine when the belt is put together. If you've routed the strap running ends correctly you'll see the | hash marks. If not, you have a twist somewhere.
7. Finally, place an arrow -------> under the quick-fit adaptors' webbing facing in the same direction as the other arrows.
The beauty of this simple marking is that if you have done your assembly correct, you'll see all your arrows pointing in the same direction ------->and your hash marks will be visible; | speeding the rigging process, and insuring the HSPR is assembled correctly for safety and reducing the work load on the jump master. Have every squad do their HSPRs at the same time by a single or pair of paratroopers who KNOW EXACTLY HOW TO MARK THEM. Time is of the essence in an Airborne operation; the vulnerability of an enemy to Airborne coup de main can often be measured in just hours; for example: a few more minutes and "jumpers would have been away" under the night skies of Haiti had diplomatic negotiations stalled. The faster we can "mount up" multiple Brigades for a combat drop, the better the chances of us catching the enemy by surprise with overwhelming mass. Every second counts; especially when multiplied by 15,000+ paratroopers in the 82nd Airborne Division.
CPT. Robert Albino, U.S. Army SF suggests that a product-improved HSPR would have loops in the color sequence of RED, WHITE and BLUE followed by BLACK eyelet and SILVER release handle cables. Every American can remember RED, WHITE and BLUE!; these are also the colors of the 82nd Airborne Division, the largest users of the HSPR. A PIP HSPR would have the arrows and memory device printed on to speed the rigging process. In the next article, we describe an easier way to fold up the Hook, Pile Tape Lowering Line (HPT LL) and how an improved version could look like.
AIRBORNE!
Mike Sparks, 1st Tactical Studies Group (Airborne)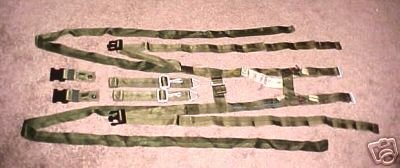

PO Box 73253
Ft. Bragg, NC 28307-3253